Thursday, March 29, 2012

Monday, March 26, 2012

Refresh Blogger/Blogspot/website Automatically

1.Login to your blogger dashboard--> layout- -> Edit HTML

2.Scroll down to where you see <head> tag .

3.Copy below code and paste it just after the <head> tag.

<meta HTTP-EQUIV='refresh' content='15;URL=http://yoursite.com'/>

Note: Replace http://yoursite.com with your blog or website URL.

15 is the time period between 2 page refresh.Change it as your choice.

4.Now save your template and you are done.
Share:

Blogger Post and Country-Specific Domains

How to Prevent your Blogger blog from redirecting the country-specific URL.

Google, as most would know, redirects Blogger blogs to country-specific domains. For instance, if you open onedirection.blogspot.com in your browser, you might be redirected to onedirection.blogspot.in if you are located in India or to onedirection.blogspot.com.au if you access the same blog from Australia.

Prevent Blogger from Redirecting to Country-Specific Domains

Go to your blog inside the Blogger Dashboard and choose Template. Then click the �Edit HTML� button followed by �Proceed.� Next, copy-paste the following code into the template after the <head> tag. thanks to labnol for this code

<script type="text/javascript">
var blog = document.location.hostname;
var slug = document.location.pathname;
var ctld = blog.substr(blog.lastIndexOf("."));
if (ctld != ".com") {
var ncr = "http://" + blog.substr(0, blog.indexOf("."));
ncr += ".blogspot.com/ncr" + slug;
window.location.replace(ncr);
}
</script>

Click the Save Template button and now your Blogger Blog will always serve with the blogspot.com URL.

This simple script parses the domain name (document.location.hostname) of your blog page and if it includes a country-specific URL (like blogspot.in), it will force-redirect the visitor to the blogspot.com address using the /ncr switch.
Share:

Mies van der Rohe's 126th Birthday Google Homepage

Google Homepage today Commemorates 126th Birthday of German architect Mies van der Rohe. Building Google Doodle.

Mies developed a design approach based on advanced structural techniques and Prussian Classicism. He also developed a sympathy for the aesthetic credos of both Russian Constructivism and the Dutch De Stijl group. He borrowed from the post and lintel construction of Karl Friedrich Schinkel for his designs in steel and glass.

Mies worked with the magazine G which started in July 1923. He made major contributions to the architectural philosophies of the late 1920s and 1930s as artistic director of the Werkbund-sponsored Weissenhof project and as Director of the Bauhaus.

Mies van der Rohe's 126th Birthday Google Homepage, mies van der rohes 126th birthday google doodle.jpg
Share:

Sunday, March 25, 2012

Installing Archive on Blogger/blogspot Website

Here's the easy steps on how to setup a Archive page for your blogger site.

This is my popular question?? 

How do I put my archive on it's own page?
1) Put my archive on a separate page, which I can link to from a tab in my page gadget and then...
2) To remove the archive gadget from the main page or make it invisible.

Alternatively, you can ignore everything above and do as I say.

1) Create a static page dedicated for archiving:
Dashboard - Posting - Edit Pages - New Page - Set page title as Archive - Publish Page - View page - copy down it's address/URL

2) We wanna add a archive gadget and place it below Post's Body.
Dashboard - Design - Page Elements - Add a gadget - Blog Archive - Click and drag the gadget so that it will below the box that reads 'Blog Posts'.

3) We gonna play with codes here. We have 2 objectives. Hide archive gadget from all pages except for the page that we have created in step 1, and hide all page elements from the page tat we have created in step 1 except for the gadget archive. At this point, let's just say things will be ALOT easier if I have known you URL. Without taking a look at your template, I cant promise the code will work in your blog. But I will post the code that works in mine.

Dashboard - Design - Edit HTML - find for </b:skin> - place the following code below </b:skin>.

<b:if cond='data:blog.url == &quot;http://alljectsart.blogspot.com/p/archive.html&quot;'>
<style>
#Blog1{
display:none;
}
</style>
</b:if>

<b:if cond='data:blog.url != &quot;http://alljectsart.blogspot.com/p/archive.html&quot;'>
<style>
#BlogArchive1{
display:none;
}
</style>
</b:if>


4) Save it. Goodluck

If this does not work on you, please post your URL here after finishing steps 1 and 2.
Share:

Saturday, March 24, 2012

Thumbnails Related Posts for Blogger

Here the answer for Related Posts Widget for Blogger with Thumbnails.

For displaying the thumbnails,this widget will use the images uploaded for the post using the blogger image uploader(from the post editor) [Update - Now supports external images also.]

Related Posts Widget with Thumbnails for Blogger

Thumbnails Related Posts for Blogger
Here are the detailed steps to install the related posts widget for blogger with thumbnails.

1.First of all Login to your blogger dashboard and navigate to Layout > Edit HTML and check the "Expand Widget Templates" check box

2.Now look for

</head>

and replace it with

<!--Related Posts with thumbnails Scripts and Styles Start-->
<!-- remove --><b:if cond='data:blog.pageType == &quot;item&quot;'>
<style type="text/css">
#related-posts {
float:center;
text-transform:none;
height:100%;
min-height:100%;
padding-top:5px;
padding-left:5px;
}

#related-posts h2{
font-size: 1.6em;
font-weight: bold;
color: black;
font-family: Georgia, &#8220;Times New Roman&#8221;, Times, serif;
margin-bottom: 0.75em;
margin-top: 0em;
padding-top: 0em;
}
#related-posts a{
color:black;
}
#related-posts a:hover{
color:black;
}

#related-posts a:hover {
background-color:#d4eaf2;
}
</style>
<script type='text/javascript'>
var defaultnoimage="http://1.bp.blogspot.com/_u4gySN2ZgqE/SosvnavWq0I/AAAAAAAAArk/yL95WlyTqr0/s400/noimage.png";
var maxresults=5;
var splittercolor="#d4eaf2";
var relatedpoststitle="Related Posts";
</script>
<script src='http://blogergadgets.googlecode.com/files/related-posts-with-thumbnails-for-blogger-pro.js' type='text/javascript'/>
<!-- remove --></b:if>
<!--Related Posts with thumbnails Scripts and Styles End-->
</head>

3. Now Find

<div class='post-footer-line post-footer-line-1'>

f you cant find it then try finding this one

<p class='post-footer-line post-footer-line-1'>

Now immediately after any of these lines(whichever you could find) place this code snippet

<!-- Related Posts with Thumbnails Code Start-->
<!-- remove --><b:if cond='data:blog.pageType == &quot;item&quot;'>
<div id='related-posts'>
<b:loop values='data:post.labels' var='label'>
<b:if cond='data:label.isLast != &quot;true&quot;'>
</b:if>
<script expr:src='&quot;/feeds/posts/default/-/&quot; + data:label.name + &quot;?alt=json-in-script&amp;callback=related_results_labels_thumbs&amp;max-results=6&quot;' type='text/javascript'/></b:loop>
<script type='text/javascript'>
removeRelatedDuplicates_thumbs();
printRelatedLabels_thumbs(&quot;<data:post.url/>&quot;);
</script>
</div><div style='clear:both'/>
<!-- remove --></b:if>
<b:if cond='data:blog.url == data:blog.homepageUrl'><b:if cond='data:post.isFirstPost'>
<a href='http://www.bloggerplugins.org/2009/08/related-posts-thumbnails-blogger-widget.html'><img style="border: 0" alt="Related Posts Widget For Blogger with Thumbnails" src="http://image.bloggerplugins.org/blogger-widgets.png" /></a><a href='http://bloggertemplates.bloggerplugins.org/' ><img style="border: 0" alt="Blogger Templates" src="http://image.bloggerplugins.org/blogger-templates.png" /></a>
</b:if></b:if>
<!-- Related Posts with Thumbnails Code End-->

4.You can adjust the maximum number of related posts being displayed by editing this line in the code.

var maxresults=5;

you will also have to edit the posts per label(it should ideally be one more that maxresults)

max-results=6

5.To edit the title of the widget you can change this line of code

var relatedpoststitle="Related Posts";

6.To change the default thumbnail, you can edit this line of code

var defaultnoimage="http://1.bp.blogspot.com/_u4gySN2ZgqE/SosvnavWq0I/AAAAAAAAArk/yL95WlyTqr0/s400/noimage.png";

7. save.

How to display the related posts on every page and not only on the post pages?
Share:

Thursday, March 22, 2012

Juan Gris 125th Birthday � Google Doodle

Google Homepage Commemorate 125th Birthday of Juan Gris.

Jos� Victoriano (Carmelo Carlos) Gonz�lez-P�rez, better known as Juan Gris, was a Spanish painter and sculptor who lived and worked in France most of his life. His works, which are closely connected to the emergence of an innovative artistic genre�Cubism�are among the movement's most distinctive.

Juan Gris 125th Birthday � Google Doodle, juan gris 125th birthday
Share:

Tuesday, March 20, 2012

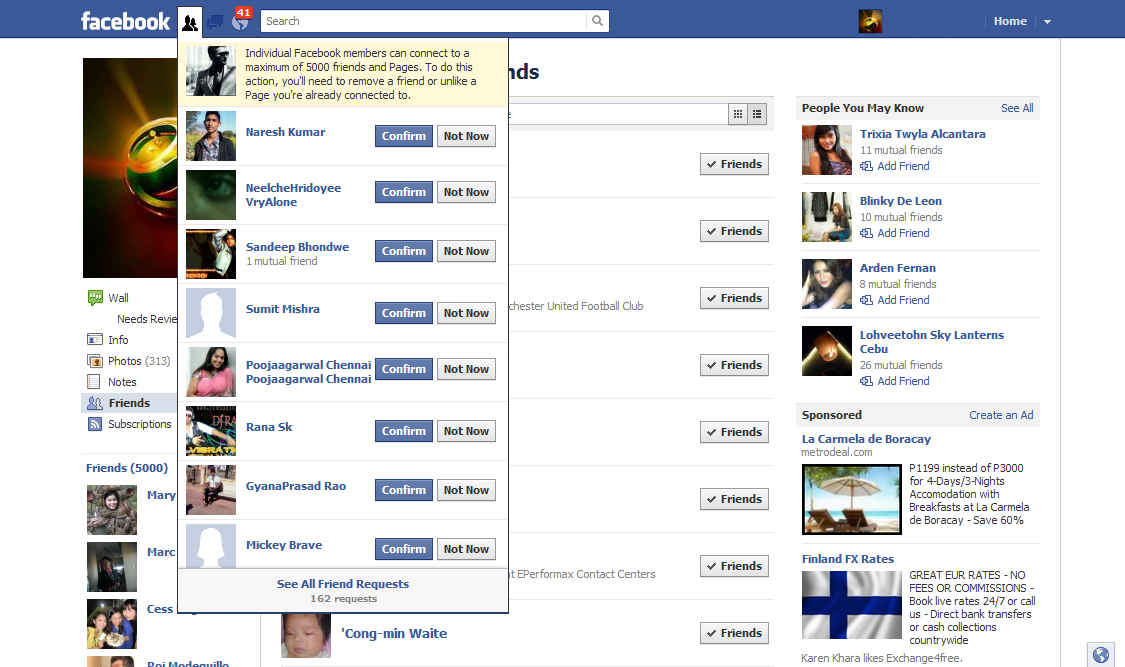
Answer: Individual Facebook members can connect to a maximum of 5000 friends and Pages

Individual Facebook members can connect to a maximum of 5000 friends and Pages. To do this action, you'll need to remove a friend or unlike a Page you're already connected to.

To unfriend someone:

1.Go to that person's profile (timeline)

2.Hover over the Friends box at the top of their profile (timeline)

3.Click Unfriend

Note: If you choose to unfriend someone, you will be removed from that person's friends list as well. If you want to be friends with this person again, you'll need to send a new friend request.

Answer: Individual Facebook members can connect to a maximum of 5000 friends and Pages

manage your settings for each app you�ve authorized:

1.Click the at the top right corner of Facebook and click Account Settings.

2.From the menu in the left column, select Apps.

3.Select the app you want by clicking on the app's name or the edit link

4.Choose an audience with the audience selector from the App activity privacy section. That app can only publish stories to people within the audience you choose.

To manage your general settings for apps and websites:

1.Click the at the top left corner of Facebook and pick Privacy Settings.

2.Under the Apps and Websites heading, click Edit settings. From here, you can turn off all platform apps, control what information is open to your friends through apps and websites they use, and more.
Source(s):
Face Book Help Center
Share:

Thursday, March 15, 2012

How to Update Google AdSense Ad Code

Here's the video tips on how to update your old ad code to the new code. I will be watching times again to ensure i follow the instructiona well.

By updating your ad unit code, you'll be able to make changes to your ad units from within your account, without updating your pages. Additionally you'll have access to richer performance reports and optimization suggestions.

Watch video here:

If you have existing ad units you'd like to keep using, you can easily upgrade your ad code within your account using our import code option.

1. On your website, find and copy the AdSense code that you'd like to update.
2. Sign in to your account.
3. Visit the My ads tab.
4. Click the Import button.
5. On the next page, name the ad unit you're creating. We suggest including the site, page, location, and appearance.
6. Paste the code that you copied into the Old AdSense code box.
7. Click Import. This creates a new AdSense unit with the same settings as the old one.
8. Replace the old code on your pages with the newly generated code, and save your pages.

In the future, you'll be able to make changes to this AdSense unit from within your account, without updating your pages.

Share:

Tuesday, March 13, 2012

Akira Yoshizawa 101st Birthday Origami Art by Robert Lang

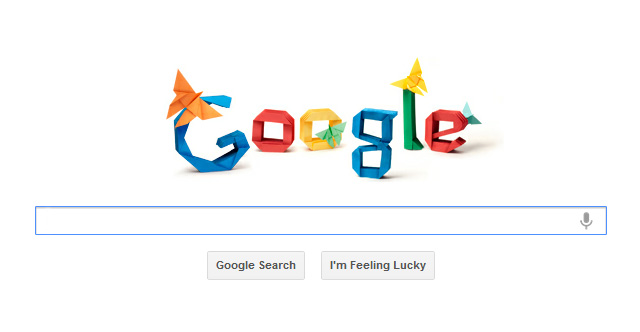
Today is 101st Birthday of Akira Yoshizawa, Google Homepage commemorate with a Doodle.

Akira Yoshizawa was considered to be the grandmaster of origami. He is credited with raising origami from a craft to a living art. According to his own estimation made in 1989, he created more than 50,000 models, of which only a few hundred designs were diagrammed in his 18 books. Yoshizawa acted as an international cultural ambassador for Japan throughout his career.

akira yoshizawa 101st birthday origami art by robert lang.jpg
Share:

Friday, March 9, 2012

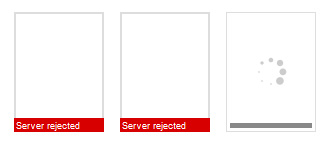
Picasa Uploading Picture � Server rejected

Here's the solution tip/advice to your problem. my photo blog won't upload photos! all images are being rejected by the server. any other solutions?

The problem has nothing to do really with which editor you are using as some forum replies may suggest. That may fix the problem for one or two images but you will be back in the same boat soon unless you deal with an issue at Picasa..

The problem is that the photo album at Picasa where your photos have been getting stored is now full and Picasa, for whatever reason, has not automatically generated a new album. The best thing to do is go to Picasa and manually create a new album then upload a couple pictures to it. After that you should be able to start uploading images again and will be able to until that album is full. Then you repeat the process.
Picasa Uploading Picture � Server rejected, server rejected message.jpg
The worst case scenario is that you have to upload your images to Picasa directly then in the New Editor when you want to upload an image you go to that Picasa album and get the image you just uploaded, but I have not had to do that so far except with the 1st image or two to get the ball rolling.
Share:

Answers: add Pinterest Follow button on WordPress/Blogger/Joomla!

Here's the tutorial on How to add a Pinterest Follow button.

For webmasters, Pinterest now offers pin it button for websites. It will help your readers to pin content just by clicking the button right from your page. So your readers will able to pin your posts and pages to their pinboards without leaving your site. As it is a virtual pinboard exist online, Pinterest will always do crawling for images or videos when someone share a link to their pinboards.

Therefore if your posts or pages contain images or videos, you are ready to be pinned. But if you don't have images or videos on your posts, Pinterest button still allows you to specify external image or video to be shared when users pin your content. But the main problem is, you can't just implement Pin it button on your site.

Pin it button does not crawl implemented page automatically as the Pin it bookmarklet do and you need to configure it individually. So official Pin it button always needs to specify exact URL of post and URL of the image or video on the page. But when it comes to Blogger/WordPress or Joomla, you can't edit each and every page to add Pin it button individually. So you can't make use of official Pin it button in Blogger. Eventhough you are able to edit your pages and configure Pin it button individually, it will a waste of time if you have many number of pages on your site. But here you will find an alternative way to pin your content which derived from Pinterest Pin it bookmarklet. So Blogger users still able to let their readers to pin content from their blogs. However it has no associated button count. Interested? Let's implement it in your blog.
Answers: add Pinterest Follow button on WordPress/Blogger/Joomla

Button code:

Below are a list of available buttons provided by Pinterest on their website.

156x26

<a href="http://pinterest.com/USERNAME/"><img src="http://passets-cdn.pinterest.com/images/follow-on-pinterest-button.png" width="156" height="26" alt="Follow Me on Pinterest" /></a>

78x26

<a href="http://pinterest.com/USERNAME/"><img src="http://passets-cdn.pinterest.com/images/pinterest-button.png" width="78" height="26" alt="Follow Me on Pinterest" /></a>

61x61

<a href="http://pinterest.com/USERNAME/"><img src="http://passets-cdn.pinterest.com/images/big-p-button.png" width="61" height="61" alt="Follow Me on Pinterest" /></a>

16x16

<a href="http://pinterest.com/USERNAME/"><img src="http://passets-cdn.pinterest.com/images/small-p-button.png" width="16" height="16" alt="Follow Me on Pinterest" /></a>

How to add code to website:

Adding to Blogger
Go to Layout (or Design in the old interface).
Click Add A Gadget and select HTML/Javascript gadget.
Copy a code above and paste it inside the content box.
Replace �USERNAME� with your Pinterest username.
Convert Html code here:
Save.

Adding to WordPress
Go to Dashboard > Appearance > Widgets > Available Widgets.
Drag Text widget into a sidebar.
Paste in the code.
Replace �USERNAME� with your Pinterest username.
Convert Html code here:
Save.
Share:

VIDEO � Google Image Search � SEO

Here's informative video, Peter Linsley's presentation on Google Image Search, originally delivered at SMX West in February, 2009.

Watch video here:


Peter Linsley of Google Images shares some simple yet important image optimization tips that might help you get more traffic from image search engines:

1. Users prefer large, high-quality images (high-resolution, in-focus).
2. Users are more likely to click on quality thumbnails in search results. Quality pictures (again, high-res and in-focus) often look better at thumbnail size.
3. Distracting features such as loud watermarks, text over the image, and borders are likely to make the image look cluttered when reduced to thumbnail size.
Share:

Wednesday, March 7, 2012

Monday, March 5, 2012

Sunday, March 4, 2012

Saturday, March 3, 2012

Answers: Add Blogger Sitemap to Google Webmaster

How to Submit Blogger Sitemap to Google Webmasters? Here is video tutorial describes how you can add your blogspot.com blog to Google Webmaster Tools using an XML sitemap.


Add Your Blogspot Blog Sitemap to Google Webmaster Tools

Step 1. Open the Google Webmaster Tools website at google.com/webmasters and click "Add a Site" button to submit your Blogger blogger.

You can either type the web address (URL) of your blogspot.com blog or even a self-hosted blog where you are using the Blogger platform with your personal domain.

Step 2. Google will ask you to verify that you are the owner of this blog. Just copy-paste the meta code to the clipboard and then paste* this information into the template of your Blogspot blog.

*You should switch to the "HTML" version of your blog template and paste the code just below the tag.

Step 3. Go back to Google Webmaster Tools and select "Sitemaps" from the right sidebar. Now click the "Submit a Sitemap" button.

Step 4. Type atom.xml?redirect=false and submit. Once the clock status icon changes to a green tick, your Blogger sitemap has been successfully submitted to Google for indexing.
Share: